3D Models
Formats
.glb
Creating a 3D model
3D cannot be created in the editor. They have to be created in a 3D modeling software and imported into the editor by placing them in the assets folder.
Using a 3D model
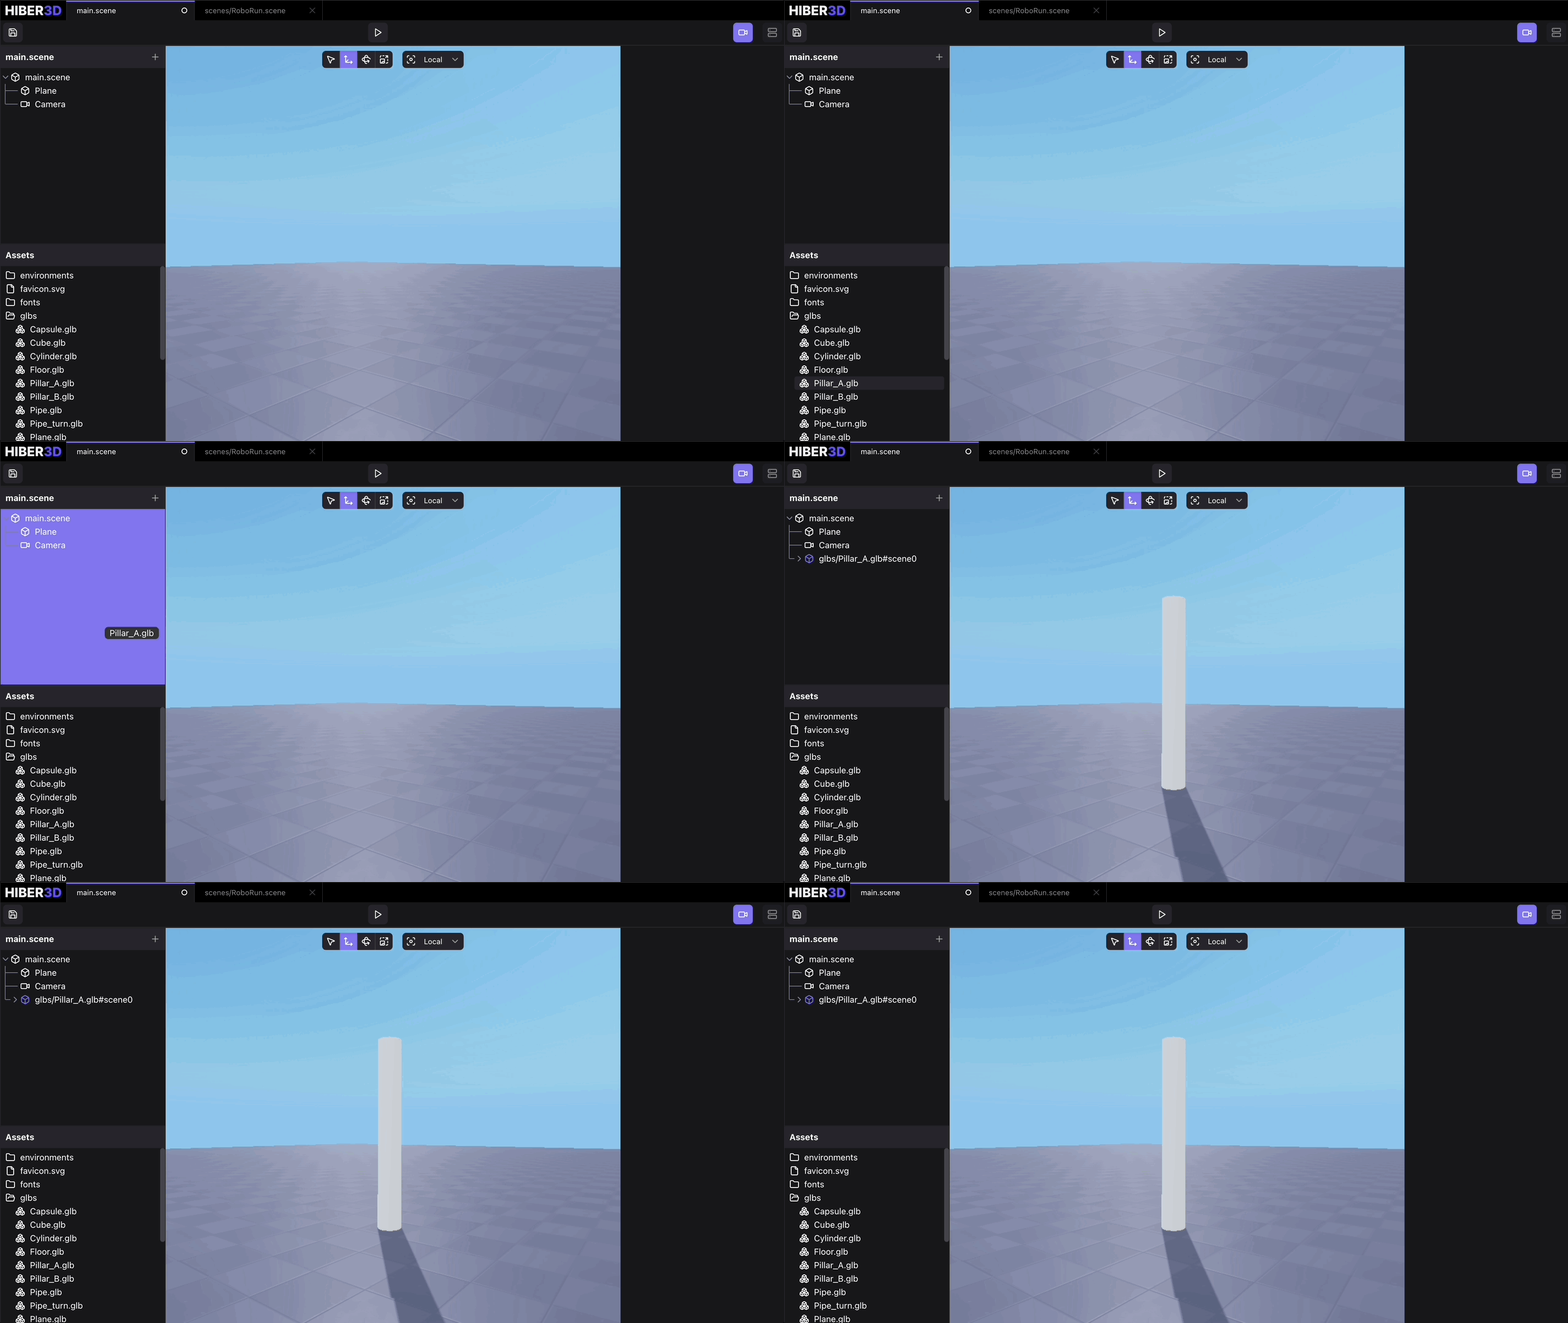
Drag and drop the .glb file from the Assets panel into the Scene panel. this will create a new entity in the scene that references the first scene found in the .glb file.

Viewing .glb contents
Click on the .glb file in the Assets panel to expand it and see all the contents of the file. It will show all the scenes, meshes and materials inside.
Using a mesh only
- Create a new Renderable component on an existing entity in the Inspector panel.
- In the Renderable component form, Open the Mesh dropdown and select the mesh from the
.glbfile. You find the mesh in the list by searching for the name of the mesh or the.glbfilename. - (Optional) You can also drag and drop a mesh directly from the Assets panel into Mesh dropdown in the Inspector panel to reference it.
Using a material only
- Create a new Renderable component on an existing entity in the Inspector panel.
- In the Renderable component form, Open the Material dropdown and select the material from the
.glbfile. You find the material in the list by searching for the name of the material or the.glbfilename. - (Optional) You can also drag and drop a material directly from the Assets panel into Material dropdown in the Inspector panel to reference it.
Specifications
- A uv shell can occupy max 30 uv tilesMax number of bones = 68 (including root node)
- Max number of vertices = 65536
- Normal map uses DirectX
- Texture resolution needs to be power of two (it doesn’t have to be square, i.e 512x1024 works)
GLB currently supports
- Scenes
- Meshes
- Materials
- Light sources (pointlight & spotlight)
- Animations (skinned & object transform)
Last updated on